Rise of the Tomb Raider Challenges: All 18 Explained
Complete Rise of the Tomb Raider challenges with all 18 regional objectives, target counts, gear requirements, and tips for tricky dives and hidden items.
Jump to

How to Start and Track Regional Challenges
One hidden incense burner can turn a quick cleanup into another lap around a tomb. Rise of the Tomb Raider challenges reward exploration with XP, but some require equipment or story progress before you can finish them. This guide covers all 18 regional objectives, including target counts, useful landmarks, and the requirements that can hold up your progress.
Challenges generally begin when you perform an action that counts toward their objective, such as shooting a burner or cutting down a flag. Open the map and select the challenge view to check your progress; the map-menu shortcut is Y with Xbox controls.
Unlock Eye for Detail, a Level 1 Survivor skill, to make challenge objects easier to find with Survival Instincts.
| Region | Challenges | Objectives |
|---|---|---|
| Syria | 1 | Shoot 7 incense burners |
| Siberian Wilderness | 1 | Loot 3 Trinity soldiers |
| Soviet Installation | 4 | Destroy 10 laptops, burn 7 posters, explore 5 caves, cut down 7 flags |
| Geothermal Valley | 5 | Shoot 8 targets, pen 5 chickens, cut down 6 rabbits, complete 4 dives, fill 5 barrels |
| Acropolis | 1 | Shoot down 6 walkie-talkies |
| Research Base | 1 | Destroy 4 fuel tanks |
| Path of the Deathless | 1 | Light 6 signal braziers |
| The Lost City | 4 | Cut down 5 bells, burn 8 banners, destroy 8 statues, light 5 signal fires |
Official page: Rise of the Tomb Raider™ (store.steampowered.com)
Syria and Siberian Wilderness
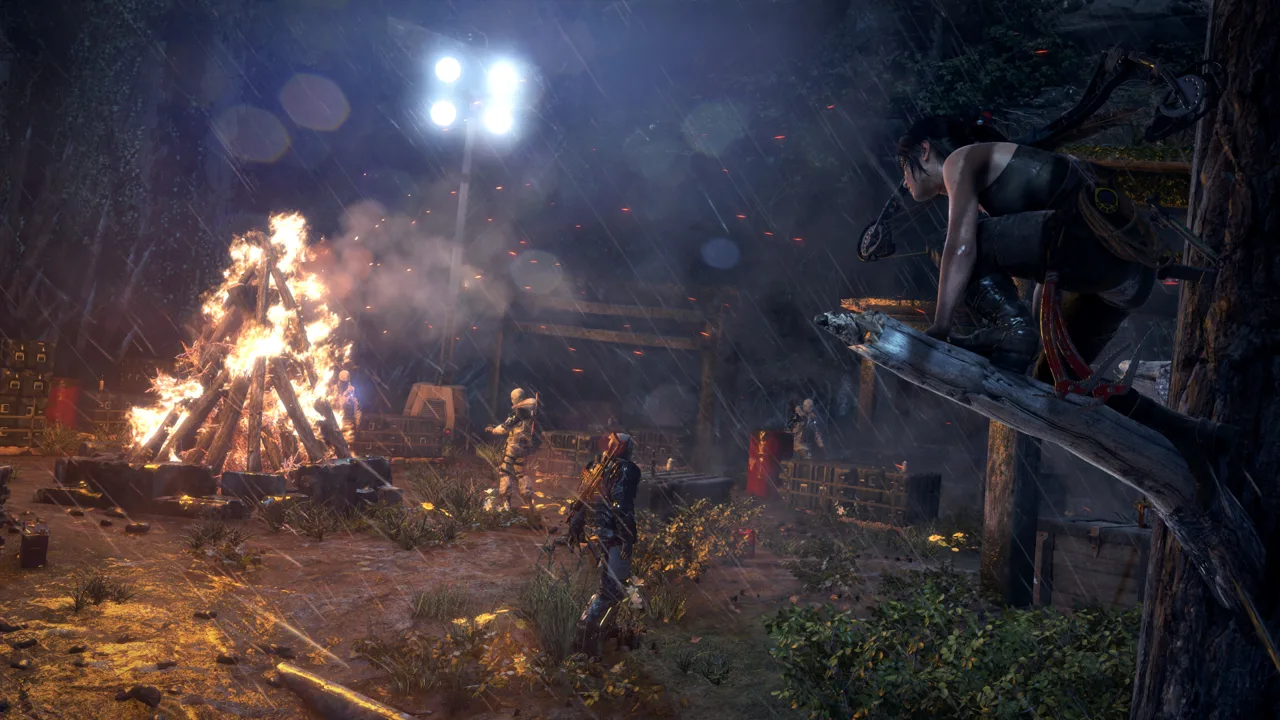 Image: Steam / Crystal Dynamics
Hang 'Em High: Shoot 7 Incense Burners
All seven burners hang inside the main chamber containing the Prophet’s tomb. Search above walkways, beneath arches, and around the central tower.
Follow this route through the chamber:
- Scan both sides when you enter. Two burners are visible before you raise the water. Look toward the entrance and the elevated walkway between the pillars.
- Raise the water and check the back-left alcove. Look upward for another hanging burner.
- Turn toward the central tower. A burner hangs beneath its upper level.
- Search the rear alcoves. Another burner hangs near the arch behind the tower.
- Check the back-right archway. Look for a lower-hanging burner in the recess.
- Climb toward the upper exit. The final burner hangs above the walkway leading out.
Keep looking up as you move. These targets blend into the chamber’s hanging decorations and stonework.
Grab and Go: Loot 3 Trinity Soldiers
When Trinity soldiers arrive in the Siberian Wilderness, defeat and loot three of them.
The looting matters. Killing the soldiers alone does not fulfill the objective, so search their bodies before moving on.
Soviet Installation Challenges
The Soviet Installation has four challenges spread across its main outdoor area, the Gulag, and the Copper Mill Yard. You can complete some during the story, while others need equipment acquired later.
 Image: Steam / Crystal Dynamics
Data Corruption: Destroy 10 Red Laptops
Search the Gulag for red laptops, including those inside wooden structures along the combat route.
- Laptops 1–5: In the combat area after Lara and Jacob separate while trying to open the gate.
- Laptop 6: Immediately beyond that gate.
- Laptop 7: In the burning room reached after the major fight with Lara’s newly acquired Assault Rifle.
- Laptops 8–9: Inside wooden shacks in the combat area beyond the campfire.
- Laptop 10: In the room containing dead soldiers just before the railroad.
You can return for missed laptops later. Search inside the shacks rather than checking only the open combat spaces.
Difference of Opinion: Burn 7 Cosmonaut Posters
The posters are scattered through the Copper Mill Yard. Molotov Cocktails can burn several of them, but bring Fire Arrows to finish the challenge. You acquire those in the Geothermal Valley, and the final poster requires them because no Molotov Cocktails are available nearby.
Check these locations:
- Behind the flammable cloth doorway near the tomb entrance, beside the stairs where Lara learns to throw Molotov Cocktails.
- On the second level of the barn reached using the slide and jump.
- Above the doorway beside the small balcony near the slide room.
- Inside the small room left of the yellow ladder leading farther up the mill.
- High on the wall to the right before the second rope-swing crossing.
- Beyond a flammable barrier down the nearby stairs, above a table.
- On the second level behind a railing in the final mill area where Lara starts the fire.
Use Fire Arrows for the return trip so you can handle every remaining poster without searching for bottles.
Into Darkness: Explore 5 Caves
Enter five qualifying cave or crypt entrances in the Soviet Installation. There are eight cave entrances and two crypt entrances that can contribute.
Walk a little way inside each entrance; standing outside is not enough. You only need five qualifying locations, so include nearby caves while moving between other objectives.
Capture the Flag: Cut Down 7 Soviet Flags
You need the combat knife to cut the flags free.
Search the following landmarks:
- Outside the shop in the northern corner of the main area.
- Downhill from the shop, near the closed silver doors.
- On top of a silo beside a shack and cave farther downhill.
- At the top of the broken mill building in the central area.
- Near the lookout tower on the route toward the Copper Mill Yard.
- Left of the campfire at the Copper Mill Yard entrance.
- Southeast of the campfire where Lara first entered the Soviet Installation, beside the fence.
Several flags require climbing. Check the tops of structures when a flag is visible but the cutting interaction is out of reach.
Geothermal Valley Challenges
The valley contains five challenges. The farmstead supports several immediately, while the upper village and final diving board require later story progress.
 Image: Steam / Crystal Dynamics
Bull's-Eye: Shoot the Centers of 8 Targets
All eight targets are accessible during your first visit. Hit the center of each target; shots into the white outer ring do not count.
Use regular arrows. Grenade arrows can destroy a target without adding it to the challenge counter.
| Target | Location |
|---|---|
| 1 | On the stone archway west of Valley Farmstead Base Camp, left of the stairs when facing west |
| 2 | In the white birch tree near the blacksmith’s cabin and stone well |
| 3 | On the west side of the stone tower near the blacksmith’s house |
| 4 | In the guard tower near the builder who gives the Defensive Strategy mission |
| 5 | Beneath the third section of elevated wooden walkway crossing toward the House of the Afflicted Challenge Tomb |
| 6 | Beyond the low opening near the House of the Afflicted, hanging from a tree outside the fence in the wolf area |
| 7 | In a clearing off the steep northwest path toward the Architect’s Crypt, beyond a small wooden bridge |
| 8 | In the barren clearing near the bear’s den and Baths of Kitezh entrance, above and right when facing the cave |
For the walkway target, look underneath the crossing rather than scanning the trees around it.
Fowl Play: Put 5 Chickens in the Pen
Near Valley Farmstead Base Camp, pick up chickens and throw them into the wooden pen in front of the pumpkin patch.
Repeat until five chickens are inside. The farm area has enough chickens for the objective, so use those nearby instead of carrying one across the valley.
If chickens stop appearing, leave the area and return to encourage them to respawn.
Hung Out To Dry: Cut Down 6 Snared Rabbits
All six rabbits hang on the west side of the river. Valley Farmstead and Ruins Encampment are useful starting points for finding stragglers.
Check these spots:
- The builder’s guard tower: The same tower containing a Bull’s-Eye target.
- Below the guard tower: Down in the valley, roughly ahead of where the House of the Afflicted exit zip line drops you.
- The tall wooden structure: Southeast of the previous rabbit, near a corner of the structure containing a strongbox.
- The southwestern cliffside hut: Beyond the Remnant hunter’s cabin and the lynx’s hunting ground.
- The northwest village path: Beside the cloth canopy sheltering a document.
- The bridge near Ruins Encampment: On the west side of the crossing where Sofia rallies the troops.
At the tall wooden structure, inspect the space between the platform and the rock supporting it.
High Dive: Dive From 4 Wooden Boards
The diving boards are marked with red paint. Perform a dive from each of the four locations.
Two access requirements matter: complete Defensive Strategy for the hunting-tower ladder, and finish Flooded Archives before reaching the board near Ridgeline Base Camp.
| Diving board | Where to go | Access requirement |
|---|---|---|
| Beacon spire | Climb partway up the tower where Lara lit the signal beacon, then drop down near the board | Accessible along the beacon-tower route |
| Hunting tower | Find the tower beside the lake, south of the Remnant hunter’s cabin | Complete Defensive Strategy to add the ladder |
| Behind the falls | Follow the northern path from Ruins Encampment toward the Pit of Judgment Challenge Tomb | Reach the path behind the waterfall |
| Upper waterfall | Search near Ridgeline Base Camp, above the Architect’s Crypt | Complete Flooded Archives and return to the valley |
If you are missing one late in the game, check the board visible from Ridgeline Base Camp.
Tossing Gourds: Land Pumpkins in 5 Barrels
This challenge becomes accessible after Flooded Archives. Return to the upper village where Lara fought Trinity before climbing toward the cathedral.
From Cathedral Courtyard Base Camp, climb the stairs and drop toward the large cabin near the bonfire. Find the pumpkin patch in the village’s southwest corner, near the shelter containing a strongbox.
Put a pumpkin into each of these five barrels:
- Southwest of the patch: Beyond the barrier made from fallen trees.
- Northeast of the first barrel: Past the boulder and white birch trees.
- Farther northeast: Behind the spiked log fence, closer to the strongbox shelter.
- Above and behind the strongbox: On the elevated ledge. Throw from below, or toss a pumpkin onto the shelter roof, climb up, and throw from there.
- Behind a village cabin: Carry a pumpkin back through the village and around the first cabin on the right. The barrel sits behind another spiked fence.
Aim over the barriers and into the barrel openings. Each barrel is a separate target, so move on once a successful throw registers.
Acropolis and Research Base Challenges
Cut Short: Shoot Down 6 Walkie-Talkies
In the Acropolis, search the undersides of canopies and tents. The radios hang overhead rather than sitting on tables.
- One at the approach: Under the last canopy on the right before the market.
- Three in the market: Beneath the left canopy, the right canopy, and the rear canopy near the market exit.
- One beyond the broken bridge: Under a canopy on the left near the next Trinity encounter.
- One before the ruins: Inside the tent near the campfire.
The first four are clustered around the market approach and market itself. Continue through the region for the final pair.
Scorched Earth: Destroy 4 Fuel Tanks
The Research Base targets are fuel tanks mounted on trucks.
- Destroy the tank on the first truck in an early large combat area.
- Find the truck in front of the weather station gate.
- Search beside the frozen pond. Of the three trucks grouped there, the northernmost carries the target tank.
- Continue toward the holding-cell building. Shoot the final tank from outside, in the zip-line area.
Approach the final tank by traveling through the region. Fast traveling to the campfire at that end does not provide access to the firing position needed for it.
Path of the Deathless: Enemy of My Enemy
Light 6 signal braziers by shooting the red pots containing Greek Fire. Search elevated structures, and clear obstructions before trying to hit concealed pots.
Follow the route through the ruins:
- First combat area, southeast corner: Get onto a raised platform to spot the first brazier.
- Behind you, near the first stairs: Turn around and climb the steps for the next sightline.
- Beyond the first arena: Look atop a damaged building near a large bell.
- Behind a barricade: Turn back from the previous position and use a rope arrow on the rope-wrapped beam to remove the obstruction.
- Northern exit, right archway: Once outside the ruins, turn back toward the doorway and look up.
- Northern exit, opposite archway: Break the wooden beams concealing the remaining pot, then shoot it.
If a brazier is visible but its red pot is blocked, inspect the beams around it. One obstruction uses a rope-arrow pull; another can be shot apart.
The Lost City Challenges
The Lost City has four challenges involving bells, banners, statues, and trebuchet-fired signals. Search vertically: several objects sit above the streets or along fortress walls.
For Whom the Bell Tolls: Cut Down 5 Bells
Find and cut down five bells in the main city area. They occupy elevated positions, often inside towers.
Check the high rooms as you climb through the ruins. For the final bell, search the room near the southern trebuchet.
Burn 8 Deathless Banners
The banners hang on building walls throughout the main city.
Work through these clusters:
- Three on houses in the southeast.
- Three in the southern part of the city: Search around the staircase and continue a short distance northeast.
- Two near the first gate: After burning one, turn toward the stairs leading to the gate to find the other.
Look around building corners when moving between the southern banners; they are not all visible from one approach.
Vandal: Destroy 8 Headless Statues
The statues are distributed through the city and fortress ruins:
- One below the cliff near the first campfire.
- Two along the staircase leading to the first gate.
- Two in the courtyard beyond that gate: one left of the campfire and another ahead and to its right.
- One high on the fortress wall along the cliff.
- Two reached by climbing onto the roofs above the campfire: one on a ledge of the second-gate building and another on the rooftop overlooking the city.
For the last few, change elevation before searching again. The courtyard and rooftop viewpoints expose different targets.
Burn Baby Burn: Light 5 Signal Fires With Trebuchets
Use trebuchet shots to ignite five signal fires. Fire Arrows do not count for this challenge.
The southern trebuchet can reach most of the targets. For the remaining wooden signal tower in the far northwest, move to the northeastern trebuchet and fire from there.
Continue exploring
Popular pages
Rise of the Tomb Raider Beginner Guide: 12 Key Tips
Use this Rise of the Tomb Raider beginner guide to pick early skills, master stealth, upgrade your bow, gather supplies, and explore tombs with confidence.
Rise of the Tomb Raider 20 Year Celebration: DLC Guide
Explore Rise of the Tomb Raider 20 Year Celebration, including Blood Ties, co-op Endurance, bonus DLC, classic Lara skins, and VR options before you buy.
Rise of the Tomb Raider Mods: Install and Fix Guide
Explore Rise of the Tomb Raider mods with Classic Pack installation steps, outfit replacements, build compatibility tips, and fixes for texture problems.
Rise of the Tomb Raider All Outfits and Unlock Guide
Explore Rise of the Tomb Raider all outfits, including mission rewards, DLC gear, classic skins, crafting costs, and the bonuses each costume gives Lara.
Join the community
Official channels for news, updates and player help: